Sunday, November 1, 2020

Chewy Chocolate Chip Pumpkin Cookie Bars


I'm kind of a cookie snob. If it's a chocolate chip cookie, it HAS to be chewy. Crispy is fine every once in a while, but cakey is not an option. This time of year, everything has been pumpkin-ified, whether it is by the addition of real pumpkin or just pumpkin pie spices. Unfortunately, pumpkin has a high water content, and when it's added to baked goods, it can seriously affect the texture. In terms of cookies, that means it will make them so cakey that they are basically muffins in the shape of a cookie.

Almost a decade ago (!!!), the creative genius of How Sweet It Is shared a CHEWY pumpkin chocolate chip cookie recipe, and it quickly became one of my favorites. I even shared it once already on this blog seven years ago! It is perfect every single time I make it. However, sometimes I don't feel like waiting for multiple batches of cookies to bake. And without fail, I always end up with chip-less batter in the end. I decided I wanted to turn her recipe into cookie bars. And you know what? I didn't even need to do anything to it! I compared her recipe to some cookie bar recipes, and the amounts of flour and butter were basically the same, so I threw the whole thing into a 9x13 pan (lined with parchment paper), baked it for 30 minutes, and it turned out perfectly

Since then, I have made this recipe as bars countless times. I actually prefer this to the original cookie recipe, since you get thicker and chewier cookies with half the work. I have also made this in two 8x8 pans and that works really well, especially if you want to make one for you and one for a friend :) 

Tips:
  • As with the individual cookies, the bars will seem underdone when you take them out, but that really is the trick to a chewy cookie.
  • The cookie bars cut very well once they are cool, so please resist the urge to eat them immediately (unless you're okay with a big mess, which is probably worth it for warm cookie bars). 
  • Once the bars are all cut, I like storing leftovers (if there are any) in the fridge. For long-term storage, put them in the freezer!
  • They store well for a week (I honestly haven't had them last longer than that), and you can definitely make them in advance. I would just recommend letting them warm up to room temperature before serving, because not everybody likes cold cookies. 
  • If you're feeling really indulgent, these are incredible when topped with a dark chocolate ganache. 
  • I originally always made these cookies with homemade pumpkin butter, but it also works perfectly with pumpkin butter from Trader Joe's - just make sure to stock up when they have it! 
  • As I mentioned in my previous post about the cookies, I really like adding some cinnamon chips in with the chocolate chips - also, use dark chocolate chips if you can find them.
  • It's a lot cheaper to make your own pumpkin pie spice - here is a good recipe

Chewy Chocolate Chip Pumpkin Cookie Bars
Yield: 24 medium or 32 small bars
Adapted slightly from How Sweet It Is

Ingredients:
2 1/2 cups all purpose flour (312 grams)
1/4 tsp salt
3 tbsp cornstarch
1 (heaping) tbsp pumpkin pie spice 
1/2 tsp baking soda
1 1/2 sticks (12 tbsp) unsalted butter, melted and cooled slightly
1 cup packed brown sugar (200 grams)
1/2 cup granulated sugar (100 grams)
1 large egg
1 large egg yolk
2 tsp vanilla extract
1/2 cup pumpkin butter (144 grams)
1 cup dark chocolate chips
1/4 cup cinnamon chips (can use more chocolate chips if you can't find these)

Directions:
Preheat oven to 325 F. Line a 9x13 pan (or two 8x8 pans) with parchment paper.

Mix flour, salt, cornstarch, pumpkin pie spice, and baking soda in a medium bowl. Set aside.

In a large bowl, mix the melted butter, brown sugar and granulated sugar until well combined. Add the egg, egg yolk, and vanilla and stir until well mixed. Stir in the pumpkin butter until smooth.

Add the flour mixture gradually and mix until a dough forms. It might look crumbly at times, but I promise it will all come together. Resist the urge to over-mix it. When the dough is almost together, fold in the chocolate chips.

Dump the dough into your prepared pan. If you are splitting into two pans, try to split the dough evenly - using a scale helps, but isn't necessary. 

Using an offset spatula (or your hands), press it down evenly and make sure it gets into all of the corners. If desired, top with a few extra chocolate chips and cinnamon chips. 

Bake for 30-35  minutes, or until lightly golden and the edges are starting to pull away from the sides of the pan. The top will have a crackly crust and the middle will seem underbaked, but it will setup once it cools.

Cool in the pan on a cooling rack for 30 minutes, then lift the bars out of the pan (using the parchment paper) and cool on the cooling rack until completely cool.

Melted butter mixed with sugars

Egg and vanilla mixed in, with pumpkin butter just added

Dry ingredients were gently folded in

Dark chocolate and cinnamon chips added to dough

Dough split between two 8x8 pans

Dough spread out evenly

Baked perfectly - crackly on top but still gooey in the middle

This was a 9x13 batch

Chewy centers!

They sink a little bit in the center because they are so gooey

Thursday, June 18, 2020

One Pot Orzo with Beans and Veggies


When I find something that Emily will happily eat for lunch, I make a giant batch and freeze it for later! I tried a few variations of this recipe, but finally made a version that makes Emily grab by the handful to shove in her mouth. I freeze in these silicone trays and heat up 2 cubes for Emily's lunch. 

Recipe: One Pot Orzo with Beans and Veggies
Adapted from The Kitchn

Ingredients:
1 tbsp olive oil
1 onion, diced
1/2 lb dried orzo pasta
1 clove garlic, minced
2 cups low sodium vegetable broth
15 oz can diced tomatoes
1 can beans, rinsed and drained (chickpeas, kidney, black, small red - all work well)
1 cup spinach, chopped (frozen or fresh)
Optional: 1/2-1 cup chopped cooked veggies

Instructions:
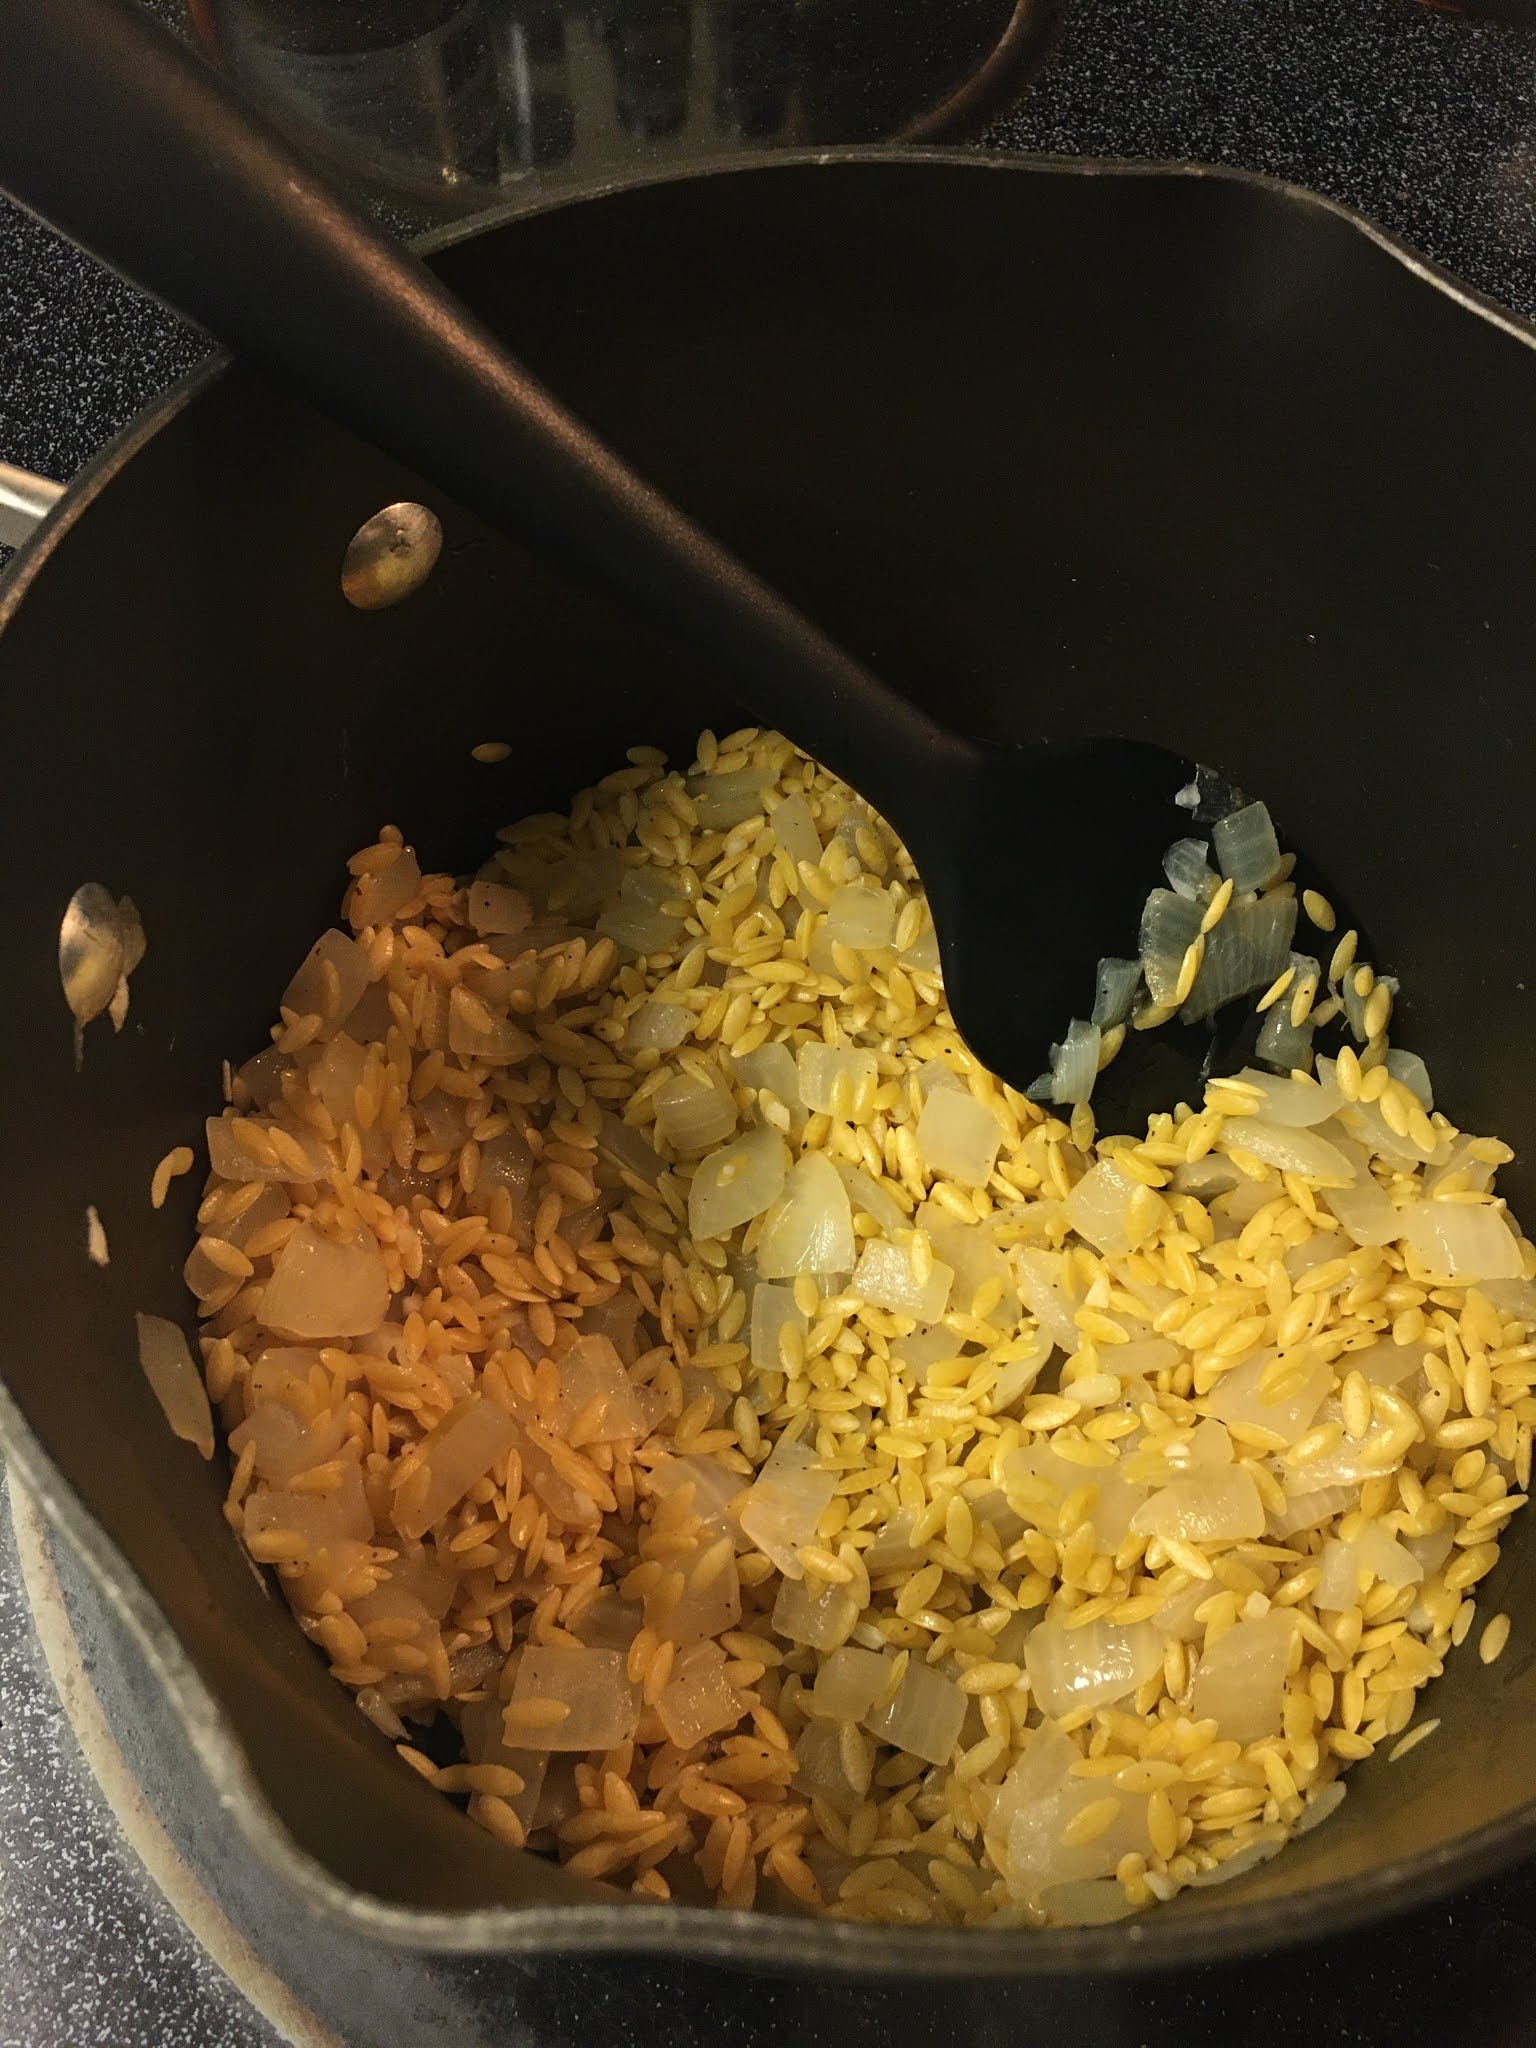
Heat oil in a medium pot over medium heat. Cook onion until translucent, about 10 minutes. 
Add orzo and garlic and cook for 1 minute. 


Stir in broth, tomatoes, and beans - bring to a boil. 

Cover, reduce to a simmer, and stir frequently to prevent sticking. Cook until the liquid is all absorbed and the pasta is cooked, about 10 minutes. Stir in the spinach and cooked veggies, if desired. 

Serve warm, or cool completely and store in the fridge for up to a week, or in the freezer for up to 6 months. 


Instant Pot Rice and Beans


We originally made this recipe to go with fajitas - adult dinner. We tried giving some to Emily for dinner the next day and we were shocked by how much she liked it. It is now part of her dinner most nights! I froze cubes of it in this silicone tray - I honestly lost track of how many cubes we got! We just microwave them for ~30 seconds. The best part is we can add a ton of veggies to mix in and Emily just keeps on eating it - she sees them but honestly doesn't care. 

Recipe: Instant Pot Rice and Beans
Adapted from: From My Bowl
Yield: ~12 servings (adult) 

Ingredients:
1 tbsp oil
1 onion, diced
1 1/4 cups dried beans (we have used small red beans, black beans or kidney beans)
1 1/2 cups brown rice
5 cups liquid (water or broth is fine)
1 cup salsa

Instructions:
Turn Instant Pot onto saute and add oil. Cook onion until it starts to turn translucent. 


Add rice and beans. Pour in water/broth and stir to mix well. 
Pour the salsa on top, but do not mix! If the salsa gets on the bottom it can burn. 

Close the Instant Pot, set the valve to seal, and use manual mode to set to 28 minutes at high pressure. 
One the cook time finishes, let the Instant Pot release pressure for an additional 10 Minutes (leave the “Keep Warm” feature on).
Move the valve from Sealing to Venting to release all remaining pressure. 
Sometimes, the beans that ended up on top look a little dry. If that is the case, stir well, replace the lid, and wait another 10-15 minutes. 
Serve warm, or let cool completely and store in the fridge for up to 1 week, or in the freezer for up to 6 months. 


Veggie Pancakes


Here is another recipe I came up with to sneak in some veggies! They can use up any veggies you have on hand, and are perfect for little hands to hold. 
They work with fresh uncooked veggies, cooked veggies, or frozen veggies that have been thawed and squeezed dry. 

Recipe: Veggie Pancakes
Yield: 10-12 pancakes

Ingredients: 
1-1.5 cups of finely diced or riced veggies - a mini food processor works really well!
1/2 cup flour or oats or baby cereal (anything to thicken them)
2 eggs
1/4 tsp garlic powder
1/2 tsp Italian seasoning

Instructions;
Mix all ingredients well in a medium bowl. 


Heat a large skillet or griddle over medium heat. Spray with nonstick cooking spray. 
Scoop batter in 1-1.5 tbsp spoonfuls (this scoop works well) onto skillet/griddle, flatten until 1/4-1/2 inch thick. 


Cook 2-3 minutes or until lightly golden underneath and it isn't shiny on top. 
Flip and cook another 2-3 minutes, or until set. 
Let cool completely. 
Keep in the fridge for up to 1 week or in the freezer for up to 6 months. I like to store between sheets of wax paper in the freezer. Reheat in the microwave for ~15 seconds. 

Lentil and Veggie Patties


I came up with this recipe in an attempt to make some higher protein finger foods, and was shocked by how much my baby liked them. I wasn't sure if she would like the curry flavor, but she gobbles them up! They are perfect for little fingers to hold, and they are great for little ones who are experimenting with forks. I am listing the veggies that I used, but really anything you have on hand would work perfectly - about 2 cups of diced raw veggies, or 1 cup of diced cooked veggies. 

Recipe: Lentil and Veggie Patties
Yield: 13-16 patties

Ingredients:
1/3 cup brown or green lentils
1 tbsp oil
1 onion, diced
1/2 cup celery (about 2 medium stalks), diced
1/2 tsp minced garlic
1/2 cup frozen veggies (broccoli/carrot/cauliflower blend), thawed and squeezed dry
1/2 tsp curry powder
1 egg
1/3 cup quick oats

Instructions:
Cook lentils according to package instructions - usually they boil for ~15 minutes. Drain and let cool slightly. 
Add oil to a medium pan over medium heat. Add onion and celery, and cook until softened, about 10 minutes. Add water if they start to stick to the bottom of the pan. 
Add minced garlic and cook for another 1-2 minutes, being careful not to let it burn. 
Let cooked veggies cool slightly. 

In a blender or food processor, add all ingredients and blend/process until all combined well. An immersion blender also works well! 

Heat a large skillet or a griddle to medium heat and spray with nonstick cooking spray. 
Add about 1 1/2 tbsp scoops (this scoop works well) and flatten until about 1/4-1/2 inch thick. Cook 2-3 minutes until starting to turn golden brown on the bottom and the top isn't shiny anymore - carefully flip over. Cook another 2-3 minutes, or until they feel set. 


Let them cool completely. 
Store in the fridge for up to a week, or in the freezer for up to 6 months. I like to put pieces of wax paper between layers of them and store in a ziploc bag or a tupperware. 
Reheat in the microwave. 

Note - this would double really well!

Veggie Cheese Bites

I came up with this recipe when I was reintroducing dairy to my baby - I wanted to make something with cheese in it. It took her a few tries to decide that she LOVES them. Now she has one almost every day, and inhales it - every single crumb disappears. 

This recipe is really versatile - you can use any kind of veggie, and it can be fresh (uncooked) or cooked or frozen. If using frozen, make sure to thaw and try to squeeze out all of the moisture. I have had great success with broccoli, cauliflower, carrots and zucchini, but I'm sure other vegetables would work!

Veggie Cheese Bites
Yield: ~20 mini muffins

Ingredients:
1/2 cup all purpose flour
1/2 cup whole wheat flour (can use all purpose if you don't have whole wheat)
3/4 tsp baking powder
1/4 tsp garlic powder
1/2 tsp Italian seasoning
1/2 cup shredded cheese (any kind!)
1 egg
2/3 cup milk 
1 cup of very finely diced or riced veggies (a mini food processor works well)

Instructions:
Preheat oven to 375 F. 
Spray the cups of a 24-count mini muffin tin with nonstick cooking spray. 
In a medium bowl, mix flours, baking powder, garlic powder, and Italian seasoning. Mix in the cheese - it helps prevent clumping. 
In a small bowl whisk together egg and milk. 
Add egg/milk mixture to flour and gently mix until mostly combined. 
Fold in the veggies. 
Add about 1 1/2 tbsp to each muffin cup - this scoop works well, but you can just use a spoon to estimate it. 
Bake for 15 minutes, until puffed and the top springs back if you press gently. 
Cool for 5 minutes in the pan, then move to a wire rack to cool completely. 
Store in the fridge for up to a week, or in the freezer for up to 6 months. Reheat in the microwave for ~15 seconds, until warmed through. 

Mini Banana Oatmeal Muffins


I have been making these mini muffins for my baby since she was 6 months old, and she LOVES them! They are easy to make with whatever you have on hand (veggie puree, fresh fruit, yogurt, etc). They freeze incredibly well. If we are on the go, I pull one out and it thaws quickly at room temp. Otherwise I pop it in the microwave for 10-15 seconds to warm up. They are delicious with some peanut butter!

Mini Banana Oatmeal Muffins
Yield: 18-22 mini muffins

Ingredients:
1 1/4 cups oats (old fashioned or quick are fine)
1 large ripe banana
1/3 cup unsweetened applesauce (or any fruit or veggie puree or yogurt)
1 large egg
1 tsp ground cinnamon
1 1/2 tsp baking powder
1/2 tsp baking soda
1/8 tsp salt (omit if your baby is < 1 year)
Optional add-ins: up to 3/4 cup diced apples or berries or shredded carrots
Optional: 2-3 tbsp sugar - I never need to use it!

Instructions:
Preheat oven to 350 F. 
Line a 24-count mini muffin tin with paper liners or spray with nonstick cooking spray. 
Put all ingredients, except add-ins, in a blender. Blend until well combined. Stir in add-ins, if desired. 
Add 1 heaping tbsp of batter to each muffin cup (this scoop works well)
Bake for 15 minutes, or until puffed and muffin springs back when you press lightly. 
Cool for 5 minutes, then remove to a wire rack and cool completely before serving. 
Keeps for 2 days at room temp, in the fridge for up to a week, or in the freezer for up to 6 months. 

Sunday, January 19, 2020

The BEST Banana Bread (Dairy Free)


I was in the mood for banana bread, and couldn't find a recipe that matched what I was looking for.
I took some parts of different recipes and created my own - oh my gosh it is so delicious!

I think this would work well with any kind of add-ins. I used 1/2 cup dairy free chocolate chips, 1/2 cup sweetened shredded coconut, and 1/4 cup finely chopped walnuts. Feel free to make it your own!

I used some toasted granulated sugar, but you can use whatever kind of sugar you like baking with.

When it first comes out of the oven it has a bit of a golden crust. After wrapping it up, the crust softens completely and the entire bread is incredibly moist.

Ingredients:
6 T coconut oil
½ cup sugar
2 eggs, room temperature
1 tsp vanilla extract
3 medium bananas, very ripe
1 ½ cups flour
1 tsp baking soda
½ tsp baking powder
½ tsp salt
½ tsp cinnamon
1-1 ½ cups add-ins (see above)

Directions:
Preheat oven to 350 F. 
Lightly grease a 9x5 loaf pan with coconut oil or canola oil. Line the long side with a piece of parchment paper so you have a “sling” to lift out the finished bread. 
In a large heat-safe bowl, microwave the coconut oil in 15 second bursts until just barely melted. 
Stir in the sugar, followed by the eggs and vanilla, mixing until smooth. 
Mash the bananas really well (I use a fork and do it on a plate), and then stir into the sugar mixture. 
In a separate bowl, whisk together the flour, baking soda, baking powder, salt and cinnamon. 
Add the dry mixture to the wet mixture and fold in gently until mostly combined. 
Add mix-ins and fold in. 
Pour the batter into the prepared loaf pan, smoothing the top. 
Bake for 45¬-50 minutes, or until the top and edges are golden brown and a toothpick inserted into the center comes out with moist crumbs. 

Monday, September 24, 2018

Dark Chocolate, Coconut and Chia Granola

It took me a few tries to perfect this recipe! I was hoping for something with a lot of chocolate flavor, some nice granola clumps, and good nutritional value.

It all started with my favorite granola - Bakery on Main's Bunches of Crunches. I had it for the first time after a race I ran in CT last year. Bakery on Main is a local CT company and there are usually samples of their products at the CT races. We picked up a few samples of their granola and I was just blown away by the flavor. It was also the first time I had seen chia seeds used in a granola recipe.

For a while I was buying bags of the coconut version on Amazon (although the dark chocolate sea salt was my favorite). At $4.50 - $5 for an 11 oz bag, it wasn't cheap, but I made the bag last as long as I could and considered it one of my few indulgences. However, lately it has been $8 for a bag and that's an expense I can't really justify. I decided instead I would try to make my own!

I read through a lot of recipes for chocolate coconut chia granola, and found that they all started with coconut oil. After that, there was a huge variation in the amount (and type of) of cocoa powder/chocolate, oats, sweetener, and chia.

My first version was okay - it smelled fantastic, but the chocolate flavor was pretty weak, and the coconut oil dominated too much. The chia seeds didn't stick to the granola itself, which was annoying.


In my second version I added an egg white (like Deb does from Smitten Kitchen) as well as adding additional cocoa powder, and that helped, but I still had chia seed fallout.

In my third version I think I got it right! I needed a second egg white to hold those chia seeds to the oats, and I added even more cocoa powder to really boost the chocolate flavor. This is a very lightly sweet granola - I eat mine with greek yogurt that has neen sweetened slightly with some protein powder, as well as ripe sweet berries. If you prefer a sweeter granola feel free to add more maple syrup or sugar. This recipe can also be doubled if you want more servings! I made it in small batches when I was recipe testing so I wouldn't waste too many ingredients if it didn't turn out well.

Recipe: Dark Chocolate, Coconut and Chia Granola
Yield: ~3 cups (12 1/4-cup servings)
Prep time: 10 minutes, Bake time: 30-34 minutes, Total time: 40-45 minutes

Ingredients:
2 tbsp coconut oil (28 grams)
1/4 cup cocoa powder (21 grams)
2 tbsp brown sugar (add more if you want a sweeter granola)
1 tbsp maple syrup or honey (add more if you want a sweeter granola)
1/4 tsp ground cinnamon
1/4 tsp salt
2 tbsp chia seeds (25 grams)
2 egg whites (~65 grams)
1 1/2 cups old fashioned rolled oats
1/2 cup crispy rice cereal (rice krispies)
1/4 cup chopped almonds (28 grams)
1/4 cup shredded coconut (I use sweetened)

Directions:
Preheat oven to 325 F and line a small baking sheet with foil, then lightly spray with nonstick cooking spray.

In a large heat-safe bowl, microwave the coconut oil in 5-10 second bursts until it is melted but not hot. Stir in cocoa powder, brown sugar, maple syrup, cinnamon, salt and chia seeds until it forms a thick paste. Add the egg whites and mix well until smooth.

Pour in the oats, rice cereal, almonds and coconut, and stir well until everything is evenly coated.

Dump onto the foil-lined sheet and press down so it is all in one even layer. If your baking sheet is large, try to keep it all on one side of the pan - if it is spread out too much, some might burn.

Bake for 30-35 minutes at 325 F, stirring every 10 minutes, until dried out and crispy.
If you like big clusters, then try to flip over portions at a time rather than stirring - it will keep the clusters intact.
If you prefer a loose granola, then stir well each time.
Let cool completely and then store in an airtight container for up to 2 weeks.


Pre-Baking

Post-Baking - nice big clumps


Greek yogurt with 1/2 scoop protein powder, 1 tsp chia seeds,
topped with chopped strawberries, fresh figs, and 1 serving of granola

Notes:
1. Like I mentioned above, if you would prefer a sweeter granola, feel free to add additional brown sugar or maple syrup/honey. It will change the nutritional information below.
2. I like using a cocoa powder that is a blend of unsweetened and Dutch processed, like Hershey's special dark or Saco. However, it will turn out great with whatever kind of cocoa powder you have on hand.
3. While I have not tried this recipe with liquid egg whites (in a carton), I don't see why it wouldn't work. Your mixture might be slightly more wet, since liquid egg whites tend to be loose and less "gel"-like than fresh egg whites.
4. I use sweetened shredded coconut, but feel free to use unsweetened if that is what you prefer, or flaked coconut to add additional texture.
5. I use almonds because they are pretty healthy when it comes to nuts (and inexpensive), but feel free to add your favorite! Pecans, cashews, hazelnuts and peanuts would all work really well.
6. I use coconut oil because I wanted to boost the coconut flavor, and I have a giant jar of coconut oil that I had never used before. Feel free to use melted butter or oil instead.

Nutritional Information (based on 12 servings, sweetened coconut, and the listed amounts of sweetener):
116 calories
6 grams fat
15.5 grams carbohydrates
3 grams fiber
3.8 grams sugar
3.4 grams protein

Sunday, January 28, 2018

Baked Pasta with a Squash, Ricotta and Garlic Sauce

This delicious and cheesy pasta dish is comforting while still being healthy!


My husband came up with the idea to make a pasta sauce from butternut squash. He will come up with recipe ideas from time to time, and then I help him try to implement them. He thought of putting ricotta in the sauce (he really likes ricotta) and I suggested the roasted garlic. We went through a few iterations, and actually decreased the amount of pasta in the end, to make more room for delicious roasted vegetables.

Baked Pasta with a Squash, Ricotta and Garlic Sauce
Yield: 8 Servings

Ingredients:
Cheesy sauce:
1 medium butternut squash (or other winter squash), about 2 1/2 lbs
1/4 tsp salt
1/4 tsp pepper
1/4 tsp cinnamon
1 head of garlic
10 oz ricotta cheese (2/3 of a 15 oz container)
1/2 tsp salt
1/2 tsp pepper
1/2 - 1 cup low-sodium vegetable broth

Veggies:
2 onions, thinly sliced
1 zucchini, cut into half moons
2 medium heads of broccoli, chopped into florets
1 small head of cauliflower, chopped into florets
Olive oil
salt and pepper

Pasta:
8 oz short pasta (penne, rotini and cavatappi work well) - whole wheat is healthiest!
1 cup shredded cheese (use your favorite)

Instructions:
Preheat oven to 400 F. Line a baking sheet with foil and spray with nonstick cooking spray.

Peel the butternut squash and cut into rounds. Spread out in a single row on the baking sheet, spray well with cooking spray, and season with 1/4 tsp salt, 1/4 tsp pepper and cinnamon. Bake squash for 30 minutes, flipping over every 10 minutes and re-spraying, or until soft and caramelized.

Roasted butternut squash
Gently remove the outer papery edges of the head of garlic. Using a sharp knife, cut off the top 1/2 inch or so, just to expose the individual cloves. Put on a piece of foil and drizzle with a little oil, then wrap up the foil so it is completely covered. Roast at 400 for around 45 minutes, or until soft and caramelized but not dried out. To save time you can put it on the same baking tray as the squash, and check on it after the squash has finished cooking. Let garlic cool, and then squeeze out the individual cloves.
Roasted and caramelized garlic
Put the squash, garlic, and ricotta in the bowl of a food processor. Add about 1/2 cup of the vegetable broth to start, as well as 1/2 tsp each of salt and pepper. Process until very smooth. Add additional vegetable broth, if necessary, to make a sauce-like consistency. I try to make mine similar to a thick marinara, or almost like a can of pumpkin puree. Depending on the water content of your squash, you may need more or less liquid.

Once the sauce is made, you can refrigerate it for up to 3 days before proceeding with the rest of the recipe.

Line two baking sheets with foil, sprayed with nonstick cooking spray. Preheat oven to 400 F. Spread out the onions and cauliflower on one tray, and the zucchini and broccoli on another tray. Drizzle the veggies with some olive oil, and season with salt and pepper. Roast for 20-30 minutes, stirring every 10 minutes, until veggies are soft and caramelized. The zucchini might cook faster than everything else, so remove it before it falls apart if the rest of the veggies haven't cooked.

Reduce oven to 375 F. Bring a large pot of salted water to a boil. Add pasta, stir well to make sure nothing sticks to the bottom, and cook according to instructions on the box. Check 1-2 minutes before the recommended time. Once the pasta has finished cooking, reserve some of the pasta water and then drain the pasta and return it to the pan. Add the squash ricotta sauce and all of the roasted veggies, and mix well. If the sauce is too thick to stir, add a few splashes of the pasta water.

Pre-baking
Spread out well in a 9x13 pan. Cover with foil, and bake for 20 minutes. Remove the foil and sprinkle cheese evenly over the top. If the pasta looks a little dry, add a few splashes of the reserved pasta water (don't stir after you add it). Bake for another 15 minutes, or until the cheese is melted and bubbling.

Notes:
Feel free to use any vegetables that you love or that are in season! Sauteed greens would be great, as would some roasted eggplant or sauteed mushrooms.

The squash ricotta sauce can be prepared in advance and stored in the fridge for up to 3 days before mixing together the pasta.

You can make this entire dish in advance, and store it in the fridge for up to 1 day before cooking. Increase covered baking time to 30 minutes, and you may have to increase uncovered baking time to 20-25 minutes (keep an eye on it).

Store leftovers in the fridge - they reheat really well!

For anyone counting containers (21 day fix or 80 day obsession), this is:
1 yellow 
2 green ðŸ’šðŸ’šðŸ’™ 
1 blue 

Just pair your favorite protein with it and you have a full meal!