Sunday, November 2, 2014

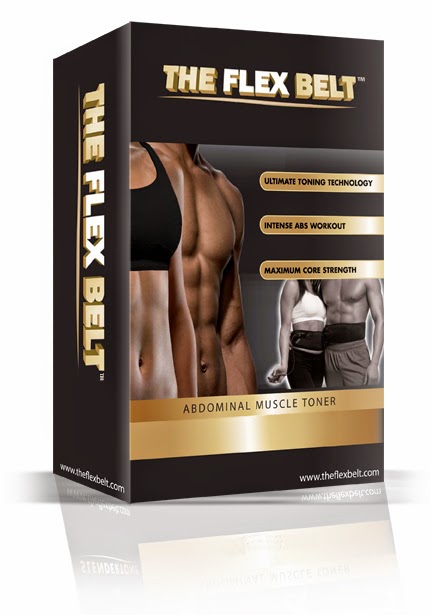
Review: The Flex Belt

 
This is not a typical post for me. I'm all about the healthy lifestyle, which to me means a combination of being active and being aware of what you're putting into your body. There are so many gimmicks out there that promise you a rock hard body, but I'm usually a big believer of hard work to see results. If it seems too good to be true, it usually is. So that's what I thought, when I was contacted by someone representing The Flex Belt. They asked me if I would like to try out their product, and then write a review on my blog. At first I thought that it was a scam - I don't get a huge amount of traffic to my blog, so I was really skeptical that someone wanted to offer me a nice product for free! I did some research, and saw that some other blogs had done similar reviews, so I figured that this was real. I talked it over with my boyfriend Joey, and he said that he would actually be interested in trying it out.

The Flex Belt was shipped out pretty quickly to us, and we did some reading on their website before getting started. We saw that this is recommended for people who are already in good shape, and who work out regularly, which made us more optimistic about what it would do for Joey. Joey already works out 5-6 days per week, and at a pretty high intensity. For me, my biggest question was whether it would do anything that his workouts weren't doing already. Although we started out being a little dubious/skeptical, we figured that it couldn't hurt at all to do one of the 30-day programs. Each of these programs includes rest days, so you end up using it 5 days/week.

So, here's some information about the Flex Belt, and what we thought about it.

The Flex Belt came with 9 different programs built into it, that range from 20-30 minutes at a time. That made it pretty easy, since you don't have to do any programming yourself. The remote clips in really easily to the belt, and one of the best features is that there is a pocket that you can slide it into during the session. Once you start up the belt with the remote, you can set each side individually, on a range from 0-150. You probably want to keep each side around the same, but it's a nice feature that they can be changed separately. One thing that was very helpful is that if you hold the "i" button down (information), it locks the keys, so you can't bump into the remote and change things while you're in the middle of your session.

If you have any questions about the programs or the setup, you can look at the videos here

The instructions were very clear for how to set up the gel pads, and it was easy to do that. We were unsure that they would last the entire 30-days actually, but surprisingly, they lasted just fine. I don't think they would have made it through 30 days of both of us using it, which is one of the reasons why only Joey tested out the product. The covers come off very easily and actually stick back to the gel pads every time, which was pretty surprising.Basically, there is some noticeable wear and tear to the pads and the covers, but not nearly as much as we expected.

One note - for anyone with a hairy chest, it will be a little more difficult to stick, but not in a way that it impedes the connection. It will just be easier for a girl, or a guy with a smooth chest.

There are a lot of different programs, and the first two are intro programs that are ~20 minutes, so Joey started on Program 3, which was the lowest program that was a full 30 minutes. He started with Level 40 on each side. As he got used to the intensity of the belt, he increased the level as well as the program he was doing, and ended with Program 6 and Level 150 on each side.

I asked Joey how he knew when he was ready to increase levels or programs, and this is what he said:
The instructions say to go to the highest level that you can stand to do it at, so if he felt completely comfortable with a level and a program, he moved up. You can feel it through your whole midsection as you go up, that everything starts contracting. When he started at Level 40 in Program 3, he could feel his abs contracting as a response to the belt. Eventually, he stopped feeling the contractions - he could feel the belt "buzzing"/"vibrating," but he could tell that his muscles were used to it, and were not really responding in the same way. At this point, he increased the Level and the Program settings until he could feel his abs contracting.

One point - this is not a defect in the product, but just something to be careful about - make sure that you have the belt centered. At the very high levels, if he was off a little, it started to hurt different areas because it was trying to contract something that wasn't there and lined up. Once he centered it, everything went back to normal. It's just something you want to be very aware of once you're at the highest level, and if it becomes misaligned, you will notice!

Also, if you've just done some abs exercises, don't do the Flex Belt right away! This isn't like doing 50 crunches, this is some serious abs work. If those muscles are already tired, this can be way too intense, and can actually cause cramping. I think that right there shows that this is a real workout.

At the really high levels, when it was really contracting, he felt like he had to clench his abs. If he didn't, the amount the belt tried to yank would hurt. In the end, this made him work his muscles even harder. Whether or not that's by design, he felt that it made the belt pretty effective.

So now it has been a few weeks since he completed the 30-day program, and he hasn't used the belt since. The real test is if he has any lasting results!

Joey said that the changes/results he achieved from the belt, he can still see. He has been maintaining the rest of his workouts since he stopped using the belt, and does feel that this helps maintain the results. He feels that if he had stopped workout out at all, that he probably would lose Flex Belt results a lot sooner.

In the end, I think that your own use of the Belt will depend on what you're doing in addition. This is generally a great way to amp up your midsection strength. If you're working out regularly, this could be a good thing to do every once in a while - whether it's the whole 30-day program, or just as a single abs workout. You could build it into your normal workout, or even use this while traveling, since it's pretty compact. If you aren't super active, then the 30-day program might be best for you, and you might want to do it at least every other month. I think this would be perfect for someone who has a desk job, and has a hard time keeping active. You can easily put it on while you're at work (although once Joey got up to the highest intensity, he definitely made some funny noises...)

Joey liked it enough that he bought a 3-pack of replacement gel pads. He envisions each set as lasting about a month, based on how the first set lasted, and would feel okay with buying one of those 3-packs each year. And now that we have this new set of replacement pads, I want to try it myself! I'm impressed with the results I can see, and even more, with the results that I can feel on Joey's midsection. I'm definitely not a great photographer, so it might be hard to see some obvious differences in the two pictures, but believe me, the differences are there. The "v-lines" are much more defined, and Joey says he just feels different, that his abs feel so much tighter. His stomach has also leaned out a bit.

Expect another review in the coming months, once I try this out myself!

If you're interested in trying out the Flex Belt yourself, click on this link.

Before picture (you can see the packaging for the Flex Belt in the background)

After picture


Saturday, October 18, 2014

Weekly Finds

I figured that this would have been completely overtaken by pumpkin, especially the desserts, but I was surprised that there were still a lot of other kinds of recipes. While yes, I do have 15 recipes that have pumpkin in them, I also have 7 recipes with apple or apple cider, and 7 recipes with chocolate. 


Breakfast:


Sandwiches and Soups:


Snacks:

Creamy Caramelized Onion and Roasted Garlic Dip

Cinnamon Sugar Candied Nuts Trail Mix

Zucchini Baba Ghanoush Genius, I never would have thought to substitute zucchini for the typical eggplant

Bread:


Dinner:


Sides:


Dessert:


Peanut Butter Chocolate Bundt Cake So much chocolate and peanut butter!

Brown Butter Snickerdoodles

Glazed Pumpkin Donuts Somehow these baked donuts look like Krispy Kreme!

Chai Spiced Cupcakes

Maple Glazed Donuts

Pumpkin Spice Babka OH MY GOD YES

Brown Butter Skillet Brownies

Doubletree Hotel Copycat Chocolate Chip Cookies

Apple Pie Scones

Chocolate Lovers' Cheesecake

Apple, Rhubarb and Cardamom Ice Cream such a unique flavor combo!

Rosemary, Honey and Fig Cake

Glazed Honey Cake

Pumpkin Cake Cheesecake I've seen pumpkin cakes, and I've seen pumpkin cheesecakes, but this somehow combines the two! Almost like a cream cheese filled pumpkin cupcake, but way better

Pumpkin Snickerdoodle Blondies

Better Chocolate Babka

Snickerdoodle Bread

Greek Yogurt Pumpkin Bread

Homemade Caramels

Apple Cider Caramels

Simple Apple Crumb Tart

Skillet Brownie

Chocolate Brownie Toasted Pecan Cookies 

Drinks:


Maple Spiced Almond Milk with a Hint of Pumpkin

Homemade Pumpkin Spice Creamer I would certainly use this for coffee every morning

Fitness:


Cooking Tips:


Wednesday, October 15, 2014

Homemade Marshmallows

This is my favorite time of year. The days are still slightly warm, getting up to 65-75 degrees, but the mornings and nights are crisp and refreshing. The air just feels different. It becomes socially acceptable to wear flannel shirts (seriously the most comfortable things ever) and leggings. Although maybe not together. Hot chocolate and spiced cider are the preferred beverages. And oh yes, it's time to make marshmallows.

I first started making this recipe several years ago. One of my good friends is allergic to corn syrup, and I was determined to find a way to make marshmallows that she could actually eat (and that didn't include really weird ingredients). It ended up being so much simpler than I thought it would, and no weird ingredients at all! Besides gelatin, which to be honest, is kind of a weird ingredient. With these marshmallows, we made the best s'mores I have ever tasted. In my life. We used thick graham crackers from Trader Joe's, and good quality dark chocolate.

Since then, I have only made these marshmallows a handful of times. I've made them for holiday gifts, and put pretty red/green sprinkles on top. I tried cutting them into fun shapes one year, but they were just too sticky for that to work.

These marshmallows can be used for so many things! Obviously, they are amazing in s'mores. I made them at the end of the summer, and they were a HUGE hit at the party I brought them to. Like I said, they make really cute gifts over the holidays. Include them with a package of good hot chocolate (or make your own mix), and your friends and family will love you forever. I haven't tried baking with these marshmallows, so I don't know how they would hold up in something like rice krispies treats. Honestly, I'd probably use regular store-bought marshmallows for those.

As a general warning - these are very different from marshmallows you buy in the store. They are so much fluffier, and a lot taller. You can probably pour them into a larger pan to make them less tall. They also melt a lot more under heat, so you have to be careful when making s'mores. It's hard to get them toasty on the outside before they start falling apart (but it is possible!) I think the best part is that even people who say they don't like marshmallows, love these.

Recipe: Homemade Marshmallows (WITHOUT Corn Syrup)
From: Sugar Plum
Yield: About 36 marshmallows, depending on how they are cut

Ingredients:
2 tbsp unflavored gelatin (2 Knox envelopes)
1/2 cup cold water
pinch salt
2 cups granulated sugar
3/4 cup water
1 1/2 tsp vanilla extract
butter to grease the pan
powdered sugar to coat the pan

Directions:
In the bowl of a stand mixer, dissolve the gelatin in 1/2 cup cold water. Over medium heat, stir the sugar, salt and 3/4 cup water until dissolved. Once it comes to a boil, let it boil for 10-15 minutes, until it reaches 236 degrees F. This will depend on how hot your stove gets, so keep an eye on it.

Note: contrary to popular belief, you don't need a candy thermometer for this. I used a regular probe thermometer and it worked just fine. Make sure you are very careful when taking it in and out of the hot sugar, and that you run it under hot water after you take it out, to remove any sugar crystals.

Once the sugar syrup reaches 236 F, take it off the heat and slowly pour it into the mixing bowl. Have the mixer on low, with the whisk attachment. You want everything to be evenly mixed in, and you definitely want to avoid splatters. Add the vanilla. Turn the speed up to medium, and beat for 20 minutes. You want the mixture to be completely white (that change happens first), fluffy, and partially cooled. The mixture and the bowl will still feel warm to the touch. It's similar to making whipped cream, in that you want stiff, glossy peaks when you pull the whisk out of the mixture. If you don't get nice peaks, then it will never set up. On the other hand, if you overmix, it will be hard to pour into your prepared pan.

While the mixture is beating, prepare your pan. Use an 8x8 or 9x9 inch baking pan (can use larger pan for less tall marshmallows), and line with parchment paper or wax paper. Butter the paper, and then dust really well with powdered sugar.

When the marshmallow fluff is ready, pour/spread it into the prepared pan. It might be difficult. A large offset spatula works really well to smooth out the top. Resist the temptation to use nonstick spray with the spatula - it will discolor your marshmallows. Instead, just put the spatula under hot water if it starts to have marshmallow stick to it. Dust the marshmallows with another layer of powdered sugar.

Now, you are basically done! Let it set completely before cutting - either put it in the fridge/freezer for a few hours, or sit out overnight. Use a sharp knife to cut, preferably one that is large, so you can cut a whole row with just one slice. The top and bottom of the marshmallows shouldn't be sticky, from the powdered sugar, but the sides will be extremely sticky. I like giving them a roll in a bowl of powdered sugar, so every side is evenly coated. You can be creative here, and use colored powdered sugar, or sprinkles. Cocoa powder could be a nice touch for a subtle chocolate flavor.

The marshmallow fluff has just been poured, and the top is nice and smooth. It is still shiny, which means it hasn't been dusted with powdered sugar yet. 

 
I've started the process of cutting and rolling in powdered sugar. It makes a bit of a mess, and I find it to be a lot easier if you lift the whole thing out, and place the parchment paper or wax paper on a cutting board. I cut them kind of thin, so they would fit better on s'mores. 

I put some sheets of wax paper between the layers, to make sure they didn't stick together

We completely filled this container, and still had a bunch more!

Look how fluffy they are! They're almost a bit spongy. There are a few air pockets - you can probably prevent that by tapping the pan a few times before smoothing out the top. It won't affect anything besides appearance

Separate note - most of the recipes I post here are vegetarian, with the exception of anything with seafood (although you can usually just omit that and be okay). These are not strictly vegetarian - gelatin is an animal-derived product. Using gelatin in a recipe will definitely not be okay with anyone who is vegan, and is questionable for vegetarians, so make sure you check with anyone you will be making these for. In a separate note, gelatin is also not kosher under the Jewish dietary laws of kashrut. Here is a post about some alternatives to gelatin (that are still acceptable for kosher Jews and vegans alike).